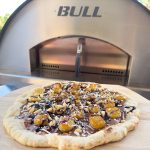
Next to firing up the wood fired pizza oven, grilled pizza is definitely my next choice for a great tasting pizza. Not only do you not have to heat up the oven to 400°F+ (which is kind of a drag in the summer), but it’s actually easier and faster once you get the hang of it. Grilling pizza produces a nice crisp crust plus you get the added bonus flavor from the char and smoke off the grill – as close as you’re going to get at home to that wood fired goodness!
I have posted a few pizza recipes over the past couple years and recently realized (duh) that they have all been made using a pizza stone. Pizza stones are an excellent way to simulate a pizza oven right on your grill, but not everyone has one and they do take upwards of 30 minutes to get nice and hot.
Here is a “little” step-by-step tutorial (kidding… it’s pretty comprehensive) on how to make a fantastic Pizza Margherita right on your grill top – and get you on your way to being a grilling pizzaiolo (Italian for pizza maker)!
If you already make pizzas on your grill, please let me know what your technique is in the comment section. 🙂
How To Grill Pizza
As I mentioned, the recipe that I am demonstrating is Pizza Margherita for the sake of simplicity. The steps involved work for pretty much any pizza that you can dream up (within reason, of course).
Organization is the key to grilled pizza success.
Do not be intimidated! Pizza on the grill differs from traditional pizza making in that you grill one side of the crust, remove it from the grill and flip it, then top the pizza and return it to the grill to continue cooking. It pays to have all your ingredients prepped and ready to go. I mean everything – the sauce, cheeses grated or sliced, toppings sliced and diced, etc.
Tools of the trade.
In addition to your ingredients, you are going to have the tools ready to go so when it’s time to flip the pizza, you aren’t running back into the house to fins the tongs. You will need:
- Flour for your work surface
- Pizza peel, cookie sheet, or sheet pan
- Polenta/grits/cornmeal (or more flour) for mobility of the raw dough onto the grill
- Tongs to flip the crust and help move the pizza on and off the grill
- Pizza cutter/sharp knife/kitchen shears to cut the fantastic pizza you just made!
Fire up the grill!
The interwebs are full of many different ways to grill a pizza – everything from super high direct heat (umm… burnt crust) to strange grill set-ups to varying times and temperature. Over the years I have had a number of different types, sizes and shapes of grills and the process of grilling pizza is fairly similar from grill to grill. However, the number of burners your grill has and the actual temperature of your grill’s high, medium and low settings OR if you are using charcoal are going to affect the way you ultimately proceed. I will give you some guidelines, but success is going to depend on your relationship with your grill.
One thing that will make itself apparent if you are using a gas grill is that gas grills, in most instances, are hotter at the back of the grill. You will need to find that sweet spot where half your pizza isn’t extra crispy.
I am going to show you what works best for me on my four-burner Angus Grill from Bull Outdoor Products. If your gas grill has a different configuration or you are using charcoal, I would suggest starting off with medium to medium high direct heat straight across and play with it from there. I preheat my grill for 15 minutes set at medium-high to high on the outer two burners and medium on the inner two burners where the pizza will sit.
As always, brush the grill grates clean with a stiff wire brush and then wipe with the grates with an oiled paper towel (hold the paper towel with tongs).
Ingredients for Pizza Margherita
- 12- to 16-ounce ball of pizza dough
- Olive oil
- Homemade Pizza Sauce or store-bought or fresh sliced tomatoes
- Sliced or torn fresh mozzarella cheese
- Fresh basil leaves
Okay, let’s make some pizza!
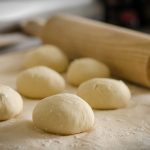
Take the dough from the refrigerator 1 hour fore you begin to use it the gluten in the flour needs to relax from being cold. Remove it from whatever it is in and place it in a mixing bowl and drizzle a little olive oil over the top and turn it to coat the ball with oil. Cover the bowl with plastic wrap or a clean dish towel. After an hour the dough will be soft and pliable and won’t keep shrinking back as you try to stretch or roll it.
Flour your work surface and stretch or roll the dough from the center out to about a 1/4-inch thick (once you get the hang of it go a little thinner) and about 12-inches in diameter – no wider than your peel.
NOTE: I suggest that if this is your first go at grilling a pizza that you make or buy extra dough. If all goes well, wrap it in plastic and save it in the freezer until next time.
Sprinkle your pizza peel/cookie sheet/back-of-a-baking sheet with polenta/cornmeal/or flour. Personally, I like the extra crunch from the polenta plus I think it gives the dough greater mobility and you don’t end up with a floury pizza crust.
Brush off excess flour from the dough and place over the polenta. Give it a couple shakes and make sure the dough easily slides around.
Open the grill cover and slide the dough onto the clean and oiled grates (no, the dough won’t melt through the grates). Immediately close the grill cover and let it cook undisturbed for 2 minutes.
Lift the grill cover and and your dough should be bubbled in places. That’s a good thing – it just means the yeast in the dough is alive and kicking.
Use tongs to check the “bake” on the underside of the pizza crust to make sure that it is marked and golden brown. If the crust sticks to the grill then close the cover and let it cook for another minute. It just wasn’t ready. If you need to cook it longer than 4 minutes, then your grill wasn’t hot enough.
Use a peel or tongs and a baking sheet to pull the crust off the grill and IMMEDIATELY close the cover. Flip the crust over so the the grill marks are facing up. If the crust is bubbled, gently flatten it with the peel. Watch your hands because those bubbles contain very hot air.
For the Pizza Margherita, spoon on the sauce – no more than 1/2 a cup – and the slices of fresh mozzarella (add other toppings now if you’d like). Traditionally, Pizza Margherita is made with slices of fresh tomatoes instead of sauce. Open the grill cover and, moving quickly to retain as much heat as possible, slide the pizza back into place.
This is the point where you need to learn to finesse your grill. I have had grills where medium-high direct heat was good from start to finish. My Bull grill gets pretty hot, so at this point I turn the inner burners down a bit. I don’t want the bottom of the crust to finish before the cheese has melted. If the bottom of your crust is getting done before the top, you may want to turn the inner burners off and finish cooking with indirect heat.
Remove the pizza from the grill and top with with fresh basil leaves.
It seems like a lot, but I promise you that it’s really quite easy and making pizza is probably one of the best ways to get to t know your grill! Again, if you already grill pizzas at home, please leave a quick comment and let me know your technique. 🙂
Cheers and Happy Grilling!
~ Jeff


Good stuff here, Jeff. I use a lot of the same technique that you display in your article. I’ve always grilled my pizzas directly on the grill, and have been very happy with that technique. I’ve never been a stone fan. Nevertheless, it looks delicious. You can’t beat a good wood fired pizza.