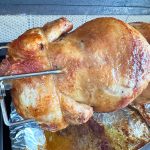
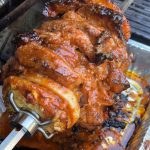
Slow cooking turkey on a rotisserie makes for an amazingly juicy bird. The self-basting action of the rotating turkey keeps all those juices rolling around and also frees you up from basting it yourself. Ideally, you should keep the turkey under 14 pounds for the sake of your rig and time. If you need more turkey than that, make two. That way you can have one to present at the table and another cut up in the kitchen ready to serve.
Brining: If you plan on brining your bird, do so for 24 hours prior to cooking. Remove from the brine and rinse inside the cavity and out to remove excess salt sitting on the skin. Note: brined turkeys brown faster, so have some foil ready to cover the parts that are browning faster. Also, do not brine a frozen turkey; it must be completely thawed before submerging into the brining solution. Here a couple turkey brine recipes to get you going:
Lemon and Honey Turkey Brine
Bourbon and Molasses Turkey Brine
Assembling: Remove the giblets and neck from a thawed fresh turkey. Drain any liquid from the cavity and blot, inside and out, with paper towels. Let the turkey sit at room temperature for one hour prior to cooking. DO NOT attempt to thaw it on the counter.
For some obvious reasons, you will need to cook the stuffing separately in a casserole. Do not stuff the bird. Season the turkey inside and out and then truss it by tying it’s legs together and it’s wings snug to the body with cotton twine. Pull the neck skin down and secure with skewers or the the threading pins you get in the turkey trussing kit.
Slide one set of spit tines/prongs onto the spit and gauge where it needs to be in order for the turkey to be centered and then tighten to secure. Skewer the turkey from neck to tail onto the spit and then slide on the second set of tines and secure tightly. Hold the spit up in your hands and test the balance. The turkey must be pretty evenly balanced on the spit for even cooking. If not balanced, undo the tines and re-secure.
Cooking: Preheat and stabilize your grill at 325°F for indirect/rotisserie cooking. Place a drip pan beneath where the turkey will be spinning – you may have to remove grates, heat shields and tamers. Brush the turkey with a little vegetable oil to assist in browning.
Secure the spit on the rotisserie and turn on the motor to be sure it can spin without hitting anything or falling off balance. Once you are sure that everything is working, close the grill cover.
A 12-pound turkey will cook somewhere between 2 1/2 and 3 1/2 hours. Influences in cooking time are outside temperature, temperature of the turkey when it went on the grill, type of turkey – heritage breeds take longer to cook than supermarket mass-produced turkeys, and how often you peek at it 😉 etc. Your turkey will be done when the internal temperature of the breast is 165°F and 170°F at the thigh. The juices should run clear and there should be no pink at the bone. Allow the turkey to rest for 30 minutes before removing the spit and carving.
Do yourself a solid and get a good instant read digital thermometer. Poke it all the way in because it’s the meat closest to the bone that you need to make sure is cooked. Be mindful not to touch the bone when measuring the temperature because it can give you a false reading.
Please feel free to write in with any questions or to share your turkey grilling experiences.
Cheers and Happy Grilling!
~Jeff



Hi Jeff, I would have to remove my grids right? There is no way that a 12# turkey would be able to turn on my Bull BBQ..
Hey Bruce – Yes, you will most definitely have to remove the grates. I also removed the heat shields and burners just for good measure, but not necessary. Good luck and please let me know how it goes. Cheers -Jeff
Do you use the rotisserie burner only, or outer burners as well?
Hello Suzette – honestly, I generally just use the outer burners to cook the turkey, then I use the rotisserie burner at the end to even up and crisp the skin. Keep an eye on the ends of the turkey closest to the burners, especially if you brine the bird. They will cook a bit faster, so it’s a good idea to keep some heavy duty foil on hand. Once the turkey gets a nice deep golden color at the ends, stop the motor, cover the ends of the turkey with foil, turn the motor back on and keep cooking. Have a fantastic Thanksgiving dinner with your rotisserie turkey the star of the feast! Let me know how it goes. Cheers and Happy Grilling ~ Jeff
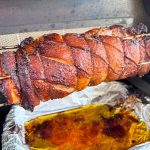
This is the 6th year ive used rotisserie in my BULL grill to cook my Thanksgiving turkey. I will never go back to conventional means ( oven or kettle roasted). It is by far the most juicy and delicious way to cook my bird. One tip , pin strips of thick cut pepper bacon on the outside of the bird to baste. You wont be dissapointed. 165*F at the thigh and its Done !
Sounds great, Jimmy! I will give that a try next year for sure. I have draped bacon over roasted turkey, but not rotisserie. Thanks for the tip! Cheers – Jeff