For this week’s recipe, I am using two of my favorites things in my outdoor kitchen: the Bull Pizza Oven and the Bull non-stick square grill pan. I love cooking meals outside in my pizza oven, changing up the routine to enjoy the outdoors and fire while I cook. Remember when I said my goal is to get all of you thinking outside the Bull BBQ Grill Box or Pizza Oven? Well, with this recipe, and many more down the road, I will do just that. Whether it is an oven roasted nicoise salad for dinner, some crispy kale chips for an aperitivo, or savory biscuits for brunch, all these recipes can be successfully cooked combining the use of a pizza oven and the Bull non-stick grill pan.
There is nothing better than a one-pot meal, or in this case, a one-pan meal. I believe the Bull non-stick grill pan is often overlooked and underestimated, when it is actually one of the most powerful cooking tools in the kitchen. With the proper guidance and my delicious recipes, I will make you a believer too! There is nothing better than taking my grill pan straight from the pizza oven directly to the table top. My goal for this recipe is to have you look at your favorite meals from a different perspective, and to teach you how to recreate them with the flexibility, creativity, and simplicity of a grill pan.
I have been exploring various options, taking my favorite meals and stepping them up a notch by using wood and fire. I find the wood fired pizza oven brings out the natural sweetness in my veggies and allows for the most amazing textures in my proteins. For this recipe the heat from the wood and coals transform the skin on the fingerling potatoes and chicken, allowing them to become nice and crispy on the outside while remaining tender and juicy on the inside.
This recipe calls for the chicken to be trussed. If you are not familiar with trussing a chicken, you can reference a poultry cookbook from your local library or search online on how to successfully truss a chicken. Truthfully, it has been a while since I have trussed a chicken, but with a little practice it was a success. If you feel that you absolutely can’t do it, you can always break your chicken down into pieces or ask your local butcher to truss and rewrap your chicken right there in the deli. My father was a butcher for 32 years, and he taught me from a young age about customer service. He was amazing and would always go above and beyond for his customers. As you guessed, trussing a chicken was one of those extra steps of love that he would do for his customers. While shopping for this recipe, I was so happy to hear that this service is still offered.
Making dinner in a grill pan is super easy. Whether it is a dinner for two, or up to fifteen, I can get all my ingredients seasoned and placed on either one grill pan, or various pans, and place them into the fridge until I am ready to cook. Once it is time, I pull the pans out to let the meat come to room temp while I start my fire. From there, the process is straight forward and again, easy. According to what you are cooking, you will learn how long it will take to cook the food accordingly. For the potatoes, I sometimes put them in at the start with the chicken and once they are done, I take them out and cover with foil and hold in a warm oven inside. Or I will time it to finish them up at the same time with the chicken. You will learn timing especially with veggies because they cook much more quickly. Grill pan cooking offers flexibility and ease. What more could one ask for? Furthermore, it is as I call it, “no mess, no fuss” cooking. I even at times will line the grill pans with foil to help remove the finished foods easily, saving time on cleanup. Tip – make sure to spray a little nonstick pan spray on the foil.
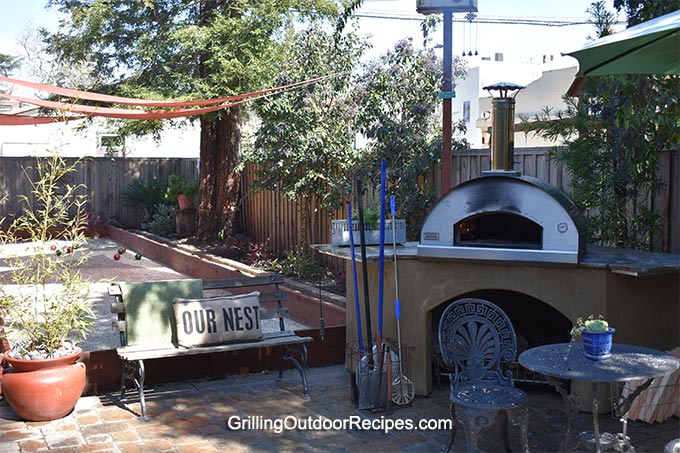 I find using the Bull Pizza Tools are very useful when using the oven. With this recipe in particular, they can help with moving the grill pan in and out of the oven without burning your arm. I use the Pro Perforated Peel to move my pans around, and it is very easy to use. With practice, you too will see what a great tool this is, especially when it comes time to make a pizza. This peel is included in the Professional Kit, and I too have this kit, which includes the necessary tools needed when it comes time to build the fire. If your are not familiar, watch this segment on how to Build A Fire.
Chef’s Note: Experiment with different types of wood. I like to use Oak wood because it gives a smokier flavor, and the wood burns longer. Also, if you do not have use of a pizza oven, your indoor oven will do trick!
- 1 whole, free range organic chicken
- 1 lemon
- 1 onion, roughly chopped
- 2 carrots, roughly chopped
- 2 stalks celery, roughly chopped
- 2# fingerling potatoes, multi color
- 5 tablespoons extra virgin olive oil, see below for division
- 5 cloves of garlic, peeled, roughly minced
- 2 sprigs of rosemary
- 4 sprigs thyme
- 4 sprigs of parsley
- Salt and Pepper
- Get your pizza oven fire going. Using the Bull Therma Gun, make sure the temperature of the stone of the oven has reached 550 degrees. Once it has, start the process of preparing the chicken.
- Take the roughly chopped veggies (creating a mirepoix mix) and place them directly onto the grill pan. Add 2 tablespoons of evoo, salt and pepper, lightly toss, lining the grill pan evenly throughout.
- Scatter the rosemary, thyme and parsley sprigs on top of the mirepoix.
- Cut the lemon in half and place on top of the mirepoix mix.
- If the chicken comes with the innards (gizzard, heart and liver), remove, rinse with water and put with the mirepoix veggie mix. This will add flavor to chicken drippings while cooking in the oven.
- Rinse the whole chicken with cold water and pat dry with a paper towel.
- Trim off any excess fat and discard.
- With the Bull Wood Handle Basting Brush, brush 2 tablespoons of evoo all over the chicken followed by salt and pepper both inside and outside of the chicken.
- Once the cooling oven has reached 450 degrees, place the chicken into the oven to cook. This should take around 1 to 1½ hours total. To avoid the chicken skin from burning, place foil over the top of the chicken for the first hour, and removing for the last 30 minutes.
- While the chicken is cooking, wash the fingerling potatoes well with water and dry. Toss the fingerling potatoes with 3 tablespoons of evoo, salt and pepper. Place them in another grill pan or carefully add them directly to the pan in the oven with the chicken and mirepoix. When the chicken has about 25 minutes to go, place the potatoes into the pizza oven. They should be done in 20 to 25 minutes.
- Roast the chicken until the Bull Instant Read Flip Tip Digital Thermometer inserted into the thigh registers to 165 degrees and the juices run clear when you pierce the thickest part of the thigh.
- Once done, remove the grill pan and let the chicken rest for at least 10 minutes on your Bull Bamboo Chopping Block, allowing it to carry over cook.
- Strain the juices from the grill pan into a small bowl, skimming off the excess fat from the top of the liquid, cover with foil and keep warm to serve along with the chicken. Taste, and if needed, add salt and pepper to the jus.
- Carve the chicken and serve along with the jus and sliced lemon, which can be squeezed on top of the chicken for extra flavor and roasted fingerling potatoes.
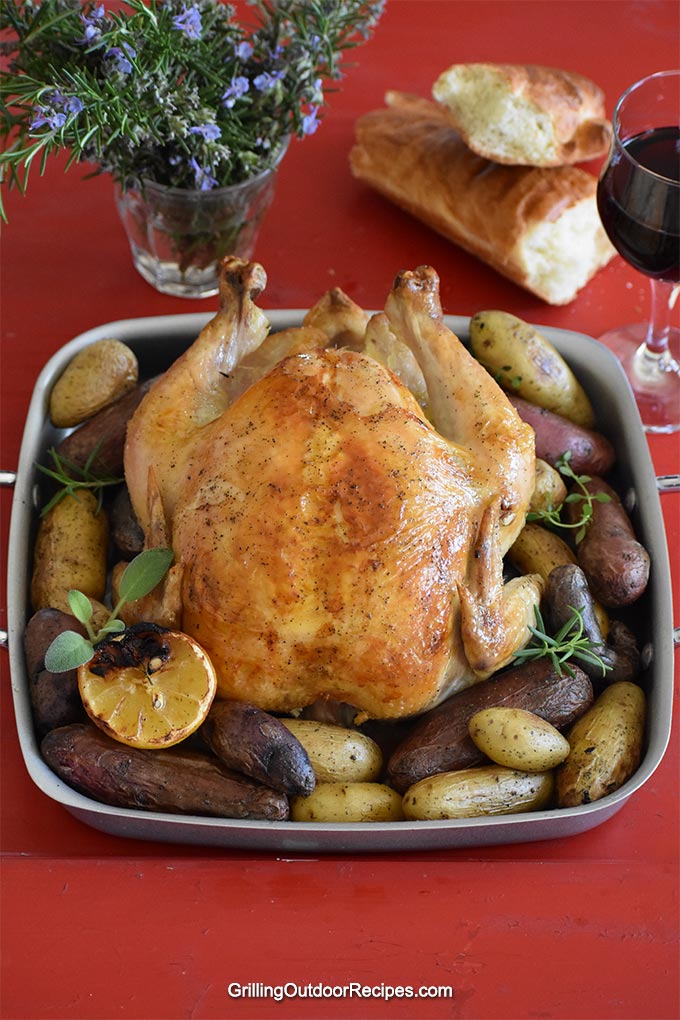

Absolutely gorgeous chicken cooked to perfection!!!
Thank you Pam! Let me know how it turns out when you make it.
941567 458609Good read, I just passed this onto a colleague who was performing slightly research on that. And he just bought me lunch since I identified it for him smile So let me rephrase that: Thank you for lunch! 596688
Your welcome! I hope you enjoyed the recipe and it was delicious!